|
Use a standard screwdriver to pry up the center button of the push in fastener. This fastener consists of two pieces: an outer sleeve and an inner pin. The outer sleeve goes into the hole through the two parts you want to hold together. Then the center pin is pushed into the sleeve. This causes the sleeve to expand, holding the two parts firmly together. So if you pull the center pin out, the sleeve can compress and you can remove it. Sometimes when you pull on the pin, it will come part way out and allows the sleeve to compress to a point where it comes out also. Other times you remove the pin totally and the sleeve stays in the hole. Just pop the sleeve out. Work slowly and carefully. Because the pin is plastic, it will want to bend and not want to come out. Just reposition your screwdriver and work around the head of the pin. It doesn't take much force and you don't want to lose control of the screwdriver and scratch your paint. It will ease out. Remove both push in fasteners. |

|
Unscrew the third fastener. |

|
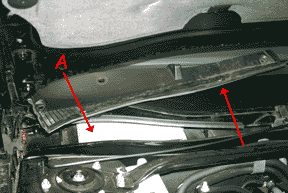
This is what it looks like after you remove the two passenger side fasteners. |

|
This is what the fasteners look like. You can see a push in fastener with the inner pin pushed out (A) and with the pin pushed part way in (B). You can also see how the sleeve spreads apart. |
|
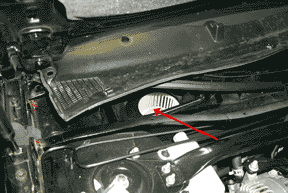
We can finally get access to the air filter. You do not have to remove the air inlet grille from the car. Just rotate it out of the way. You can see the filter (A). Don recommends that you vacuum the area to remove collected debris and to wait until after the local vegitation stops dropping things because he found seeds and the crumbled remnants of leaves on his filter. According to the manual, there is supposed to be an air deflector grille in this compartment. I didn't find one and Jay told me his 2000 LS didn't have one either. Looks like a mistake in the service manual. |
|
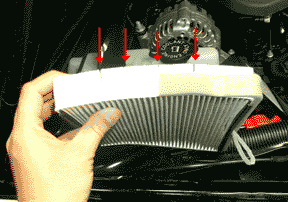
Pull gently on the tab on the air filter and it comes right out. Here you can see the fan impeller. |

|
This is the top of the air filter. The arrow indicates the tab you pull to get the filter out. |

|
Bottom of the filter. |
|
Here is something interesting. The edges of the filter are cut so the filter can bend. When you try and stick a new filter in, you'll see why the filter has to bend. It is the only way it will clear the opening. |
|
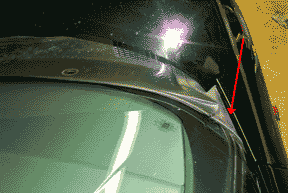
Ok, stick the new filter in and rotate the air inlet grille back into place. I found that the grille would hang up on the corner of the hood. Gently push the rubber sheet under the hood and everything will fit back nicely. This isn't a really good photo of it, but take a look at your car before you attempt to remove the grille and you'll see how this works. |

|
Make sure the hood panel bumper goes over the grille piece. Replace the fasteners. Align the holes and push in the sleeves then insert the pins. Screw on the other fastener. Reroute the windshield washer pump hose back under the hood panel bumper and clip it back into place. Reattach the hood weatherstrip. You can just push it back on. And that's all folks! |
 Cory sent these stock numbers for replacement air filters: