|
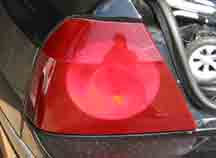
Before starting, look closely at the gap between the edge of the tail light assembly and the trunk. There is a soft black weatherstrip that prevents water from getting behind the lights. When you replace the assembly, you need to ensure that there is no gap here.
|
|
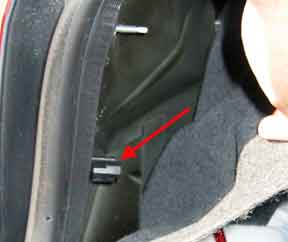
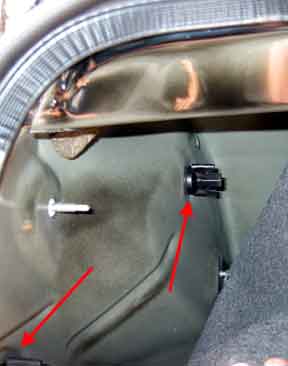
Open the trunk and remove the convenience net, if you have one. Remove the upper two wing nuts. On my car, I had to use slip joint pliers to remove the nut. If you have to, wrap a piece of cloth around the nut to protect it from the jaws of the pliers. I ended up bending the hooks on the wing nut, but it couldn't be helped. I tried a combination wrench, but the plastic of the nut kept twisting.
|
|
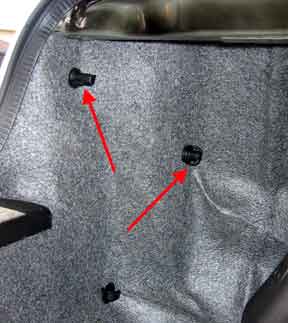
Pull back the carpet to expose the other two wing nuts. Here is one...
|
|
...and here is the other. The arrow in the bottom left corner indicates the wing nut depicted in the above photo. Remove both wing nuts.
|

|
Pull the assembly from the body. The weather strip may want to peel off the assembly and stick to the car. If it does, gently remove it from the body and put it back into place on the light. Watch out for the wing nut studs. They are sharp and can scratch the paint.
|
|
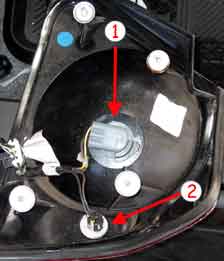
To remove the socket, press in the tab, turn the socket counterclockwise, and pull it out. Socket 1 is the bulb for the tail, stop and turn signal. Socket 2 is the rear side marker bulb.
|
|
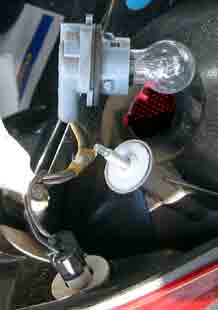
Pull the bulb straight out. Do not twist it. Replace it with a new bulb. Now put everything back together. Make sure the harness goes back into place and is not pinched. Put the assembly back into place and watch out for the sharp ends of the studs. Loosely attach the two wing nuts that are located behind the carpet. Align the assembly so there is no gap between the weatherstrip and the body panel. Tighten the wing nuts, reinstall the carpet, install the other two wing nuts and replace the convenience net.
|