|
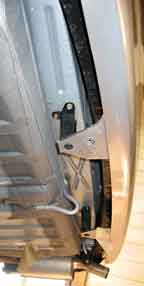
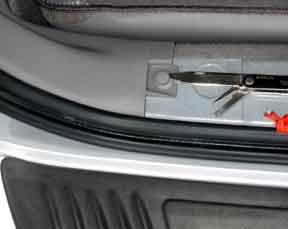
This is a photo of the mounting area under the rear bumper. The sensors can be mounted behind the bumper cover or under the bumper. If there was a steel reinforcement beam behind the cover, you would have to mount the sensors under the bumper. |
|
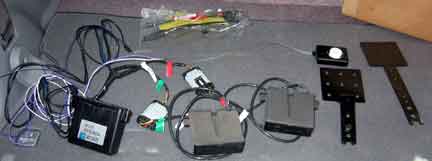
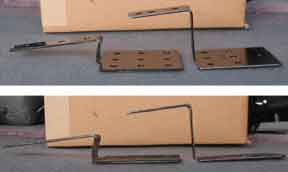
Rostra offers mounting brackets that are pre-bent for your vehicle. At only $5 a set, I went ahead and ordered the one for the 2002 MPV. Well, it doesn't fit. The set they sent me was for the 2000 model and they said it would fit the '02. Looks like Mazda changed something as the brackets were too short. They were bent exactly as shown in the installation manual so it was not like they send me the wrong ones. With a little trial and error, I bent the brackets that came with the kit. In these photos, the bracket on the left is the pre-bent one and the one on the right is the one I bent. To get a nice 90 degree bend, I used a vise and a 5 pound chipping hammer. |
|
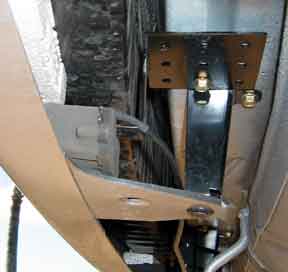
Remove the push in fastener holding the bumper cover to the support. This will allow you to flex the cover and help you get the sensor and bracket into place. Assemble the bracket and sensor, do not tighten the retaining bolt. Remove the outboard bolt holding the bumper support. Test fit the bracket and sensor in place. I had to enlarge the hole in the bracket to get it to line up with the hole in the bumper support. The hole needs to be about 1/16 inch closer to the edge. Press the sensor so it contacts the underside of the bumper cover. Remove the whole assembly and tighten the retaining nut. Then put everything back in place. Repeat for the other side. I did not use the screws included in the kit for the bracket. That would have meant drilling a hole into the body and everything seemed solid enough. Don't forget to replace the bumper cover fastener. |
|
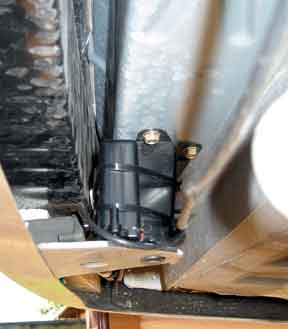
I didn't want to drill any more holes than I had to, so I tie-strapped the electronics box to the driver's side bumper cover support. You will want to put it on this side because it is easier to access the wiring on the inside of the car. |
|
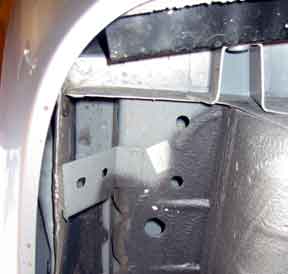
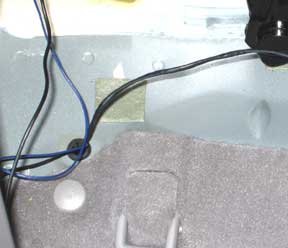
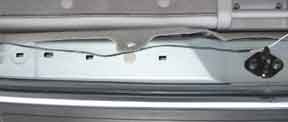
The next trick is to get the wiring into the passenger compartment. Mazda was kind enough to provide more than enough holes to choose from. This is under the rear driver's side fender. |
|
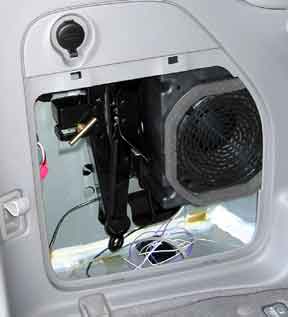
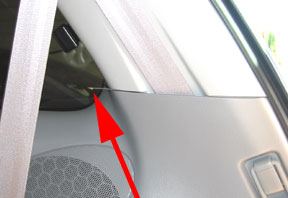
This is the hatch in the passenger compartment on the driver's side. If you look at the floorpan in this compartment, you will see a squares of foam tape. These squares cover holes that can be used to get the harness into the passenger compartment. |
|
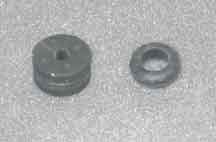
Although the holes didn't feel sharp, I picked up some rubber grommets from the local hardware store to protect the harness from chafing. The hole under the van and in the floor pan do not line up. I used an electrical fish tape to thread the wires through. You can use a coat hanger or stiff wire to do the same. |
|
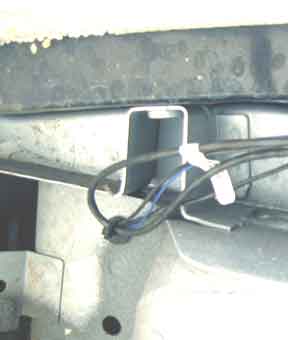
This is a photo of where the harness enters the passenger compartment. Note the square of foam tape and the rubber grommet. |
|
This is where it goes in from the undercarrage. The loop of wire is from the sensor harness, I just tied it up there to get it out of the way. Leave a little slack in the harness to allow for body flex. |
|
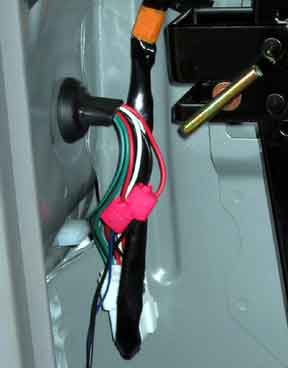
Time to tie in the power. A nice feature of this system is you only need two electrical connections. Black wire from ROSS harness to black wire from vehicle harness. Blue wire from ROSS harness to red/green wire from vehicle harness. The ROSS system is powered and activated by the reverse light circuit of the vehicle. Time to test the system. Plug in the buzzer module and LED array. Double check all your connections. Chock the tires. Turn the ignition to ON but DO NOT start the car. Put the car in REVERSE. The green LED should light. Approach the car from behind. As you get closer, the green LED should blink, then go solid as the amber LED starts to blink and the buzzer should beep slowly. As you proceed, the amber LED should go solid and the red LED should blink and the buzzer should beep faster. Finally the red LED should go solid and the buzzer should be continuous. While I do not recommend it, you may have to do this with the car running and in reverse gear. If this is the case, make sure the parking brake is on, the wheels are chocked, and a second person is in the car stepping on the brake and ready to turn the car off. |
|
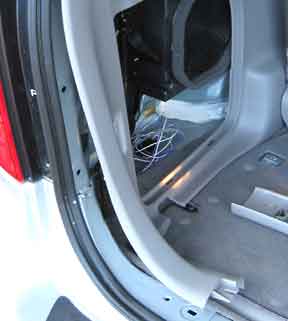
Initially I was going to run the LED array down the rear hatch window. However after doing a number of mockups with my wife in the driver's seat, we decided the best place was on the passenger side rear pillar. This meant running the harness back to the other side of the car. Had I known this before, I may have wired everything on that side of the car. Then again, it might have been hard to work with the interior trim panel in the way. The best spot to run the wiring was under the sill plate. Grab the plate and pull up. It will make a really bad cracking noise, but don't worry about it. Watch out for the metal clips, they will tend to fall off. This photo is of the removed sill plate. |
|
Remove the push in fastener that holds the bottom of the driver's side interior trim panel. It's similar to the fastener holding the bumper cover in place. Pry up the center button then lift it right out. |
|
Remove the lower hook and the upper ring. I believe it was a 10 mm bolt. |
|
Pull the panel away from the body. You do not have to remove it all the way. |
|
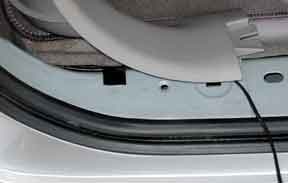
You want to position the harness so it will not be pinched or cut. There is a nice gap between the interior panels and the body. I used electrical tape to keep it in place. |
|
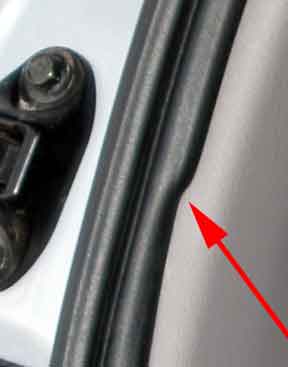
Run the harness along the corner. The gap continues along the ridge. You can lift the carpet as shown in this photo to run the wire under the carpet tabs, or just snake it under. Again, I used electrical tape to hold the harness in place. In case it is hard to tell what you are looking at in this photo, the black object on the right side is the latch plate for the rear hatch |
|
Although it's hard to see, that is the LED array. I pulled back the passenger side trim panel and used the sticky-back velcro included in the kit to mount the buzzer and ran the LED array in the gap where the upper and lower panel meet. The LED array has a self-adhesive strip on it that will not stick to the trim panel. I need to get some clear Shoe Goo to stick it in place. I turned the volume on the buzzer to maximum and it is loud enough for me and my wife. |
|
Reverse the process and put all the trim pieces back. One note of warning. As you put the panels back, make sure you do not pinch or tear the weatherstrip. As you replace the panels, run your finger between the rubber and the panel and it will slide back into place. |