|
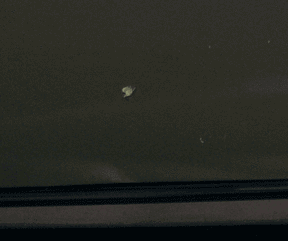
Here is the chip on my Impala. For this How-To page, I had to document the repair I did on my wife's Saturn. The Impala was so shiny, the camera couldn't focus and the photos came out really bad. However, the repair I did on my car came out great!
|
|
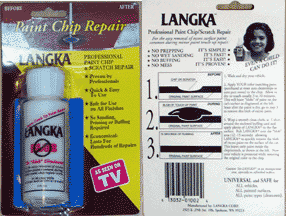
This is what you get when you ordered the 2 oz. bottle of Langka from the website. I was a bit leery when I saw the "As Seen On TV" declaration. That usually sets off my Scam Alert. But my wife reminded me that I own and love my Ginsu knives (great for cutting bread, but a "tin" can?) and FoodSaver (a must for anyone that shops at Costco.)
|
|
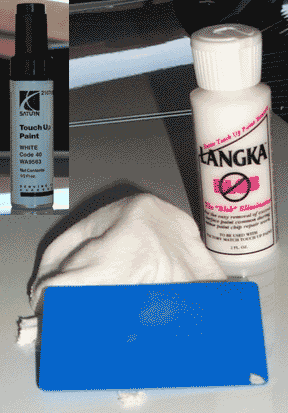
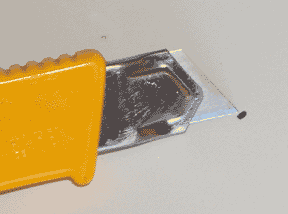
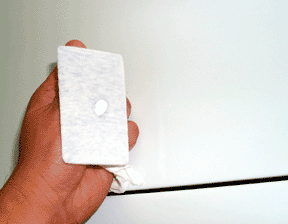
You get a bottle of Langka and the blue "buffing card" in the package. You will also need a bottle of touch-up paint for your car and a smooth, clean cloth (T-shirt or some such). Although this is not in their directions, for the repair process I will show you, you will need rubbing alcohol, a utility knife and toothpicks.
|
|
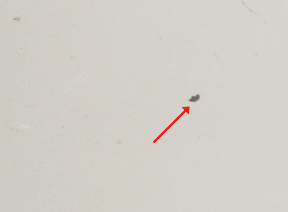
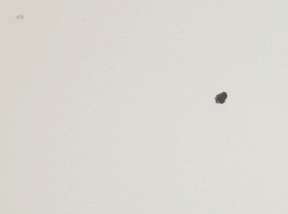
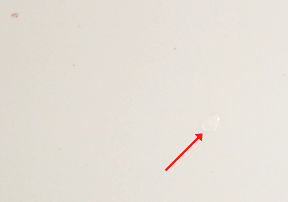
This is the chip in the hood. Clean the area with a wax remover. I used 3M General Purpose Adhesive Cleaner (part number 051135-08984) but rubbing alcohol will do.
|
|
Take your utility knife and cut the paint around the edge of the chip. Why would we want to make the damage bigger? This is an important step. Imagine that your paint is like smooth sand. If you drop a large rock in the sand, it will create a crater. The edge of the crater will be slightly higher than the surrounding sand. This is what happened on my Impala. Some other reasons for using the knife: the edge of the chipped area may have separated from the metal surface, there could be some wax/dirt in the area, or in the Saturn's case, the paint had oxidized on the edges. When I first tried this process on the Saturn, I didn't cut the paint back and the final repair had a dark outline of the original chip. This step is not part of the instructions that come with Langka, but it's an old tip I learned a long time ago. It is not necessary, but it does improve the results.
|
|
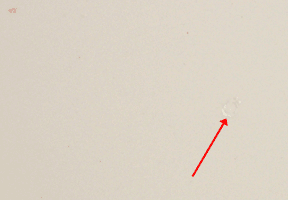
This is what the repair area looked like after cutting the paint back. Angle your blade toward the center of the chip and gently press down. Work slowly and carefully, removing a small bit at a time. You don't have to remove a lot of material. Clean the area again and allow to dry.
|
|
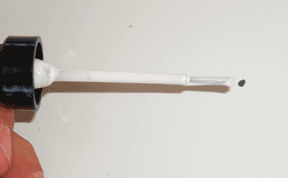
This is the brush that is in the cap of the touch-up paint. As you can see, the brush is much larger than the repair area.
|
|
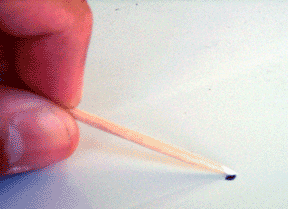
Here is another tip. Use a toothpick instead of the brush. The trick is to dab the paint into the chipped area. I cut the tip of the toothpick a little to flatten it out. Shake the bottle of paint well and use the brush to put some paint onto the tip of the toothpick. I have also heard another alternative applicator is a match from a matchbook. You would use the torn off edge as the brush. Remember, dab the paint on, don't brush it. Don't worry about getting the paint level with the surrounding paint.
|
|
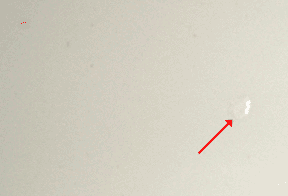
This is what it looks like when the paint is still wet. I realize it's hard to see, but I have white touch-up paint on a white car. The paint looks like a wet blob on the paint. The Langka package says to wait 5-10 minutes, but they included a revision with my order that says to wait 45-90 minutes instead. The process is temperature dependent so it may take longer in colder areas and faster in warmer ones.
|
|
This is why I said not to worry about getting the paint level. The repair paint is lacquer and when the solvent dries, it will sink into the depression. Keep adding paint until the repair is higher than the surrounding area.
|
|
This is what it looked like after 2 applications of paint.
|
|
Here is where the Langka does it's magic. Wrap the cloth around the buffing card and gather it in the back. Use the gathered cloth as a handle and squeeze some Langka onto the cloth. Gently rub the Langka over the blob, checking as you go. The paint will come off pretty quickly. DO NOT press down hard! Allow the product to do the work
|
|
Here is the completed job. If you look closely, you can see the repair. The paint on the Saturn is 6 years old and the touch-up paint doesn't match it exactly. However, I did this repair on my black Impala and you cannot easily see the damaged area. Wait a few weeks before waxing the area. Do not be surprised if the touch-up paint shrinks a bit. The solvent will continue to evaporate and may cause the area to sink. Just clean the area again and repeat the repair process. This is not something the Langka company mentions, but it happened on both the Impala and Saturn.
|