|
This is what you get from the dealer. You probably can't see it too well in the photo, but the plastic bag that held the cap and key has a little "Made in Canada" label on it.
|

|
Here is a closeup shot of the cap. The shiny ring that is recessed into the edge of the cap is where the lanyard is attached.
|

|
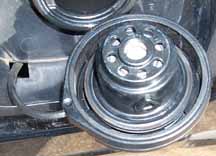
This is the existing cap
|
|
The lanyard it attached to the cap via a ring. This allows the cap to spin freely.
|
|
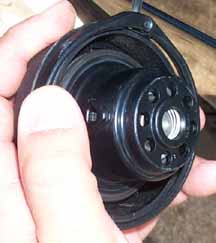
If you hold the cap in the palm of your hand and squeeze the ring from three sides (my thumb, three fingers and palm) a little slack is built up on the fourth side (where the lanyard is). There is a little gap in the ring and that is where it will pop off the cap.
|
|
This is a close up of the gap.
|
|
As you apply pressure, lift up on one side of the gap of the ring. The plan is to lift up one corner of this gap onto the edge of the cap. When this happens, you can work the ring around the edge of the cap until you free the ring. It is kind of difficult to describe this motion, It's not like opening Tupperware, where you just lift the cover straight up. You want to twist the ring. Watch out, because the ring isn't really flexable and at a certain point it will pop off and you might drop the cap.
|
|
There is a top and bottom to this ring. You can tell by the way the lanyard is attached. In this photo, this is the side you would push the cap back in to. So when you install the cap onto the car, this is the side of the ring you would see. Reattach the locking cap just like you removed the old one. Place one corner of the gap in the ring into the channel in the cap and work your way around. It will snap right in.
|
|
The only real thing I dislike about this cap is you need two hands to lock/unlock it. When the cap is unlocked, it works exactly like the stock cap. When you lock it, the top spins freely. However, because the top spins, when you put the key in, you have to hold the cap to turn the key or the cap will twist with the key.
|
