|
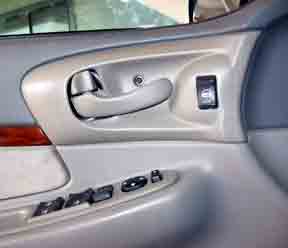
- For safety, disconnect the negative terminal of the battery.
- Remove the screw holding in the bezel.
- Remove the bezel from the door trim panel.
|
|
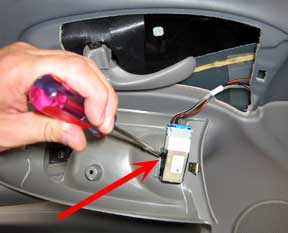
The manual says to disconnect the power door lock electrical connector. However the locking part of the connector that you would normally push down to release the clip is between the switch and the bezel making it impossible to depress. Rather than risk breaking the connector or pulling out wires, I removed the switch to get access to the locking area. The best way to do this is with a flat bladed screwdriver. You will need to pry the plastic back carefully to release the switch.
|
|
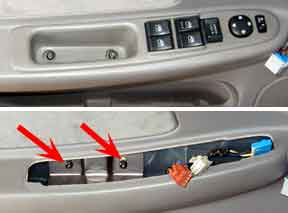
- Remove the screws from the door armrest pull cup. These are torx screws, but since I didn't have a torx driver of that size, I found that a standard screwdriver fit nicely.
- Remove the pull cup from the door trim panel using a small flat-bladed tool at the front of the pull cup and press rearward to release the clip retainer.
NOTE: Apply tape at the insertion point of the small flat-bladed tool to protect the trim panel.
- Disconnect the power window switch electrical connector and power mirror electrical connector as applicable.
- Remove the door trim panel screws from the pull cup support bracket. (red arrows)
- Remove the two screws for the door pull handle bracket.
|
|
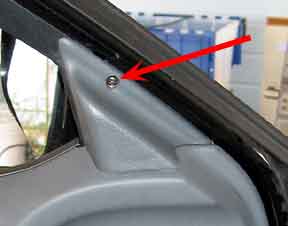
Remove this screw from the upper door trim panel. The manual says to remove this after you remove the door panel, but it makes more sense to removed it as one unit vice trying to take them off seperately.
|

|
They make a door trim removal tool, but I didn't have one. I carefully seperated the bottom of the trim panel with my hands and worked my way around the door. The top of the panel is held on by these spring clips. The best way to remove the panel is to pull the lower edge and sides away from the door then lift the whole panel up. The top of the panel will pop free from these spring clips.
|
|
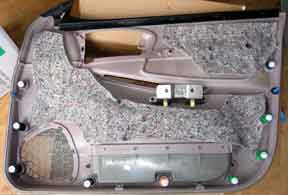
The white dots on the back side of the panel are the fasteners that hold the door on. They are push in, one way fasteners, but they will release with firm pressure. The book says to replace them before putting the panel back on, but I didn't and it works fine.
|
|
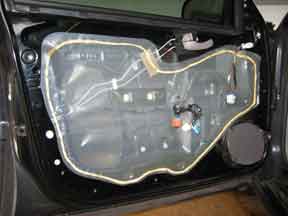
Door exposed.
|


