|
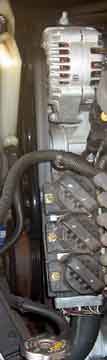
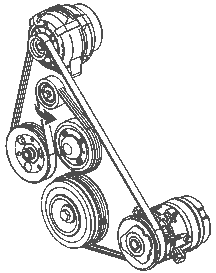
The drive belt is on the passenger's side of the engine compartment. Older cars used to have multiple belts to drive the A/C, water pump, power steering pump, etc. On the newer cars, they use only one belt, but make it fold back on itself. Some of the belt's path is not easily viewable from the top and while there is only one correct path, there are a lot different paths it can take. |
|
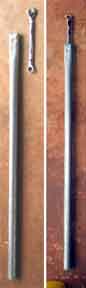
The instructions say to use a 15mm box wrench to rotate the drive belt tensioner. Unless you have arms of steel, this is no easy task. I got a section of electrical conduit and made a cheater bar by smashing one end so the wrench would fit into it. I normally don't recommend using a cheater bar, but in this case I wasn't worried about over torquing. |
|
Before removing the belt, study the path. There should be a sticker on the radiator mount that also shows the belt path. This is the belt tensioner. Install the wrench over the center nut and rotate up and toward the rear of the car. You can slip the belt off of the alternator pully. |
|
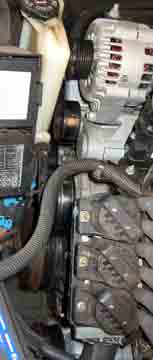
Belt removed. |
|
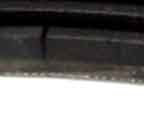
Close up of crack in belt. |
|
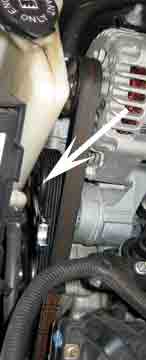
This is the correct belt path. Make sure you get this right. There are may ways to thread the belt, but only one correct one. When you thread the belt around, ensure that it is seated in the grooves. On the lower pullies, notably the crankshaft and A/C compressor, you cannot see the pullys easily. I went by feel, mostly. When you have everything in place, rotate the belt tensioner again and slip the belt over the alternator pully. Because my cheater bar was so long, I could rest the bar on my shoulder and keep the tensioner in place and have both hands free to work the belt. |
|
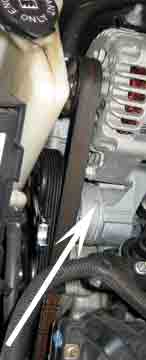
If the belt is correctly installed, the mark case into the tensioner arm should fall between the two outer marks cast into the tensioner body. Use a flashlight and check to see the belt is properly seated. |