|
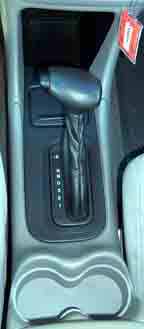
Here is your reference point. For the purposes of this article, the console is made of 3 major parts.
- The top of the center console (this is from the ashtray to the cup holders). The black area (including the area around the shifter) and the cupholder section are all one piece.
- The storage area under the A/C controls.
- The lower half of the console, including the armrest storage area. We do not remove this part.
|
|
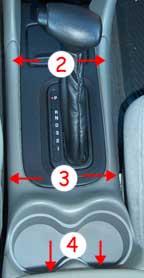
Unless otherwise specified, everything is snapped together. It's a pretty tight fit but remember we are dealing with plastic. So control is the rule vice brute force. Place both hands on the top of the ash tray lid and curl your fingertips to grasp the lip of the console. GENTLY lift up the lip of the center console. The edge will pop up.
|
|
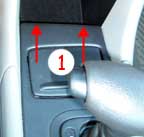
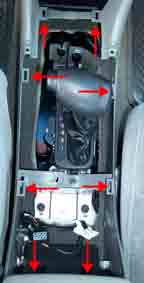
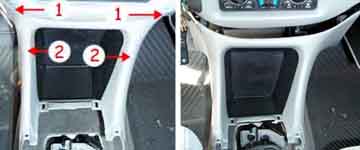
Open the armrest storage area. Grab both sides of the console at the indicated locations and gently lift. Follow the numbered order. The console will pop up.
|

|
Under the cupholders is the plug that provides power to the ashtray light and the lighter. Press the clip on the connector and pull apart.
|
|
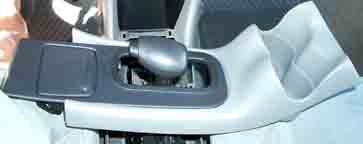
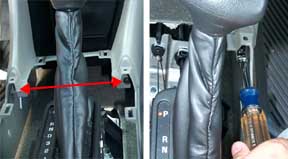
Set the parking brake and chock the tires. (Always think "Safety") Step on the brake, insert the key and turn to ON, and place the shifter into neutral. Turn the top of the console 90 degrees and lift it off the shifter handle.
|
|
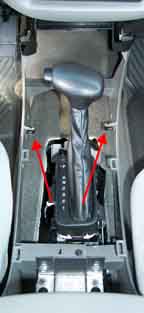
The arrows show where the top clips into the bottom half of the console.
|
|
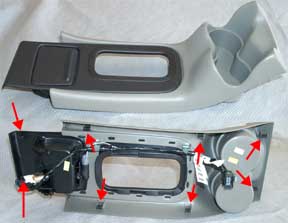
Here is a top and bottom view of the top half of the console. The arrows point out the locations of the clips that hold it in place.
|
|
Removing the top half of the center console will reveal two 7 mm hex head screws. I used a 7 mm socket with a universal joint and a driver handle.
|
|
There is a push in fastener on both sides of the center storage area. Its close to the firewall. You need to push in the center pin until you feel a click. Work your fingernails under the edge of the fastener and pry it out.
|
|
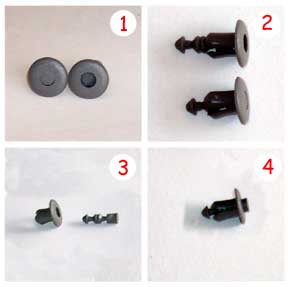
This is what the fastener looks like
- Push the center pin in to release it. The left fastener is secured and the right one is released.
- This is what it looks like from the side. The bottom fastener is secured and the top one is released.
- After you remove the fasterner, push the center pin all the way through. It should look like this.
- Reassemble the fastener by pushing the pin back into the sleeve, point first. Leave the end sticking up as you see here. When you are ready to reinstall, push the fastener back into the hole, making sure it goes through both pieces. Push the pin in flush with the sleeve to secure it.
|
|
There are two more push in clip at location 1 that are holding this piece in place. Grab the unit at location 2 and gently pull straight out. It should pop right out as shown in the second photo.
|
|
Everything removed! The arrows point out where the 7 mm screws were located.
|
|
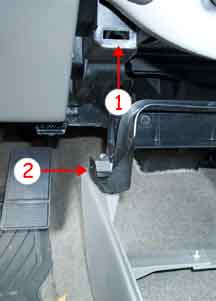
Close up of the driver's side. Arrow 1 is the location where the clips on the center storage unit fit into the car. Arrow 2 is the area where the push in fasteners were located.
|
|
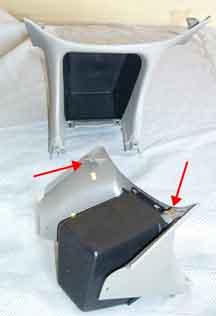
Here is a front and back view of the center storage unit. The arrows point out the locations of the clips that hold it in place.
|

|
We finally get to see the back of the radio. Arrow 1 points to the two radio connectors. The climate controls are housed in the black box (arrow 2). To properly orient you, this was taken with the camera lying on the passenger side footwell. To the right is the firewall and toward the left is the passenger compartment. Imagine that you were sitting upside-down with the back of your head on the floor.
|