|
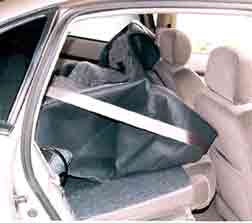
First, I had to pull all the carpet off in order to get at the bare metal of the trunk. The cover for the spare came out first, and then the four little wingnuts that secure the trunk came off. I just pulled the carpet thru to the rear seats instead of removing it entirely.
|
|
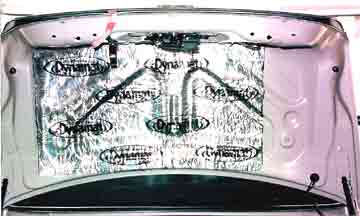
First part to go on was the trunk lid. Felt wary of covering up the Service Parts Identification paper, but I took a picture of it - I'll reference that if I ever need to. Before we put the dynamat on, we used a blowdryer to heat the material so that it was flexible and stretchable. Then we took off the backing and tried to center one corner of the stuff with the upper left corner of the trunk. We worked the stuff into the crevices of the lid quadrant by quadrant so that it would stretch better. Most of it stretched to fit the surface, but in one especially deep "dimple" I cut cross-hairs into the dynamat and pressed the resulting "flaps" into the crevice.
|
|
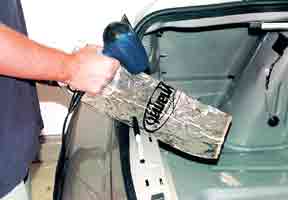
Here's just a pic of my friend using the blowdryer on a piece of dynamat. It helped make it more pliable and it stretched better. If ever we had to correct a piece that had stuck on improperly, blow-drying it loosened the adhesive and made it come off easier.
|
|
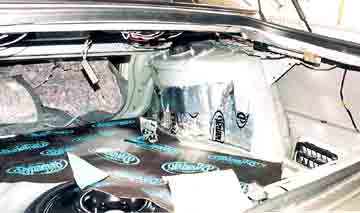
Here we laid down the dynamat on the trunk to get an idea of how much to put where. I wanted to put most of it on the floor because that was what was in direct contact with the subs and would accept most energy. So, I covered the entire trunk floor with the stuff, avoiding the spare because I figured the spare itself deadened most of the sound in that well, seeing as the rubber laid directly on the metal. If I had laid dynamat there I may not have had enough to do the quarter panels, so I'm glad I didn't.
|
|
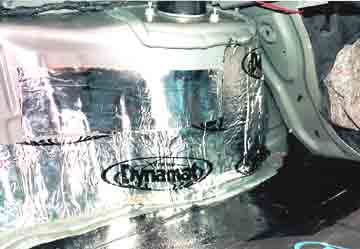
Here's where the dynamat went onto the quarter panels. It was kind of a strange fit because there was already some silver-colored stuff on the panel - maybe it was Chevy's version of Dynamat? Anyway, I decided to leave it on and split the remaining bits of Extreme where the stock stuff wasn't.
|
|
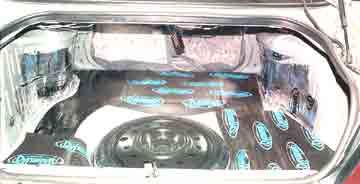
Here's a good picture of all the surfaces that were covered. That's about 16 sq. ft spread out everywhere. I could have used about another 6-8 sq. ft. - as you can see in the far left rear of the trunk, some of the metal is still bare. I'm not sure how much of a difference it makes - I'm glad I got most of the surfaces that were closest to the subs.
|
|
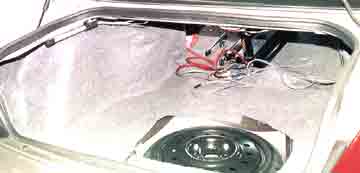
Kind of an unnecessary picture, but illustrates how you can't see the Dynamat (except on the trunk lid) with the carpet on. Real stealth stuff.
|
|
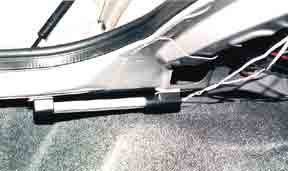
Here's where the light is mounted on the side of the trunk. They're wired into a relay that turns on when the trunk light comes on. I used Velcro from a crafts shop to mount it; the glue stuck to the metal well. Only problem was that the velcro was so strong that when I pulled the light off to rewire or fix it, the velcro on the car would come off too. It was supposed to be temporary, so I guess that's OK, but still annoying. Better than drilling holes, I suppose.
|
|
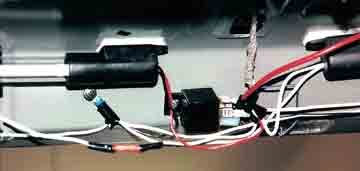
The relay is central in the picture, with the two bulbs on the sides. The big red wire with the blue quik-disconnect (on the right side) is the power that was spliced from the wire that goes to the amplifier. That means that across from it, on the left side of the relay, is where all the lights connect to for power. All the wires from the neons are just stripped and crimped into a single quik-disconnect, which then fits onto the relay prong. Closest to the camera (foreground) is where one end of the cut trunk light wire goes. On the opposite side of it, barely discernible in the background, is the other end of the trunk light wire. As soon as the relay senses that current is passing through the trunk light wire, it opens the switch between the power-from-battery to the power-to-lights wire. Think of it as a current-activated switch.
|
